Help:Operation guide Administrator
![]() English |
English | ![]() 日本語
日本語
Contents |
What is Administrator
The "administrator" of the Metabolonote system is the user who can use every function of Metabolonote.
In addition, the administrator can browse and edit all pages created by Metabolonote users.
Page Layout
In the Metabolonote system, pages and input forms that are displayed are configured based on the following specialized types of the pages.
| Name | Description |
|---|---|
| Property | This page defines the data type for each field of the form. Property settings can change the form that is used when data is edited. |
| Template | This page contains predefined sentences that compose pages. Configuring the template composition can change the page layout when data is browsed. |
| Form | This page composes input fields used for editing data. Configuring the form composition can change the page layout when data is edited or browsed. |
This section describes how to create each setting file.
Creating a Property
| Data Type | Description |
|---|---|
| Page | A link to a page |
| String | A text string with 255 characters or less. To restrict the value, separate with comma to create selection options. |
| Text | Same with String, but the length is not restricted. |
| Code | Same with Text, but the special text format used for technical documents is maintained. |
| Boolean | Truth value. This value is restricted to true or false. |
| Number | Integer and decimal |
| Geographic coordinate | Longitude and latitude |
| Temperature | Application of Number, which supports the temperature unit. |
| Date | Time |
| Indicate the e-mail address as a link ("mailto:" is added). | |
| URL | Indicate the external link to the URL object specified. |
| Annotation URI | Same with URL, but there is a difference in RDF export processing. |
| Telephone number | Verify and save international telephone number based on the RFC 3966 standard. |
| Record | Indicate the value of composite properties consisting of a list of short values described based on the predetermined type and order. |
* The table above shows each data type of "Type" in the table below.
| Property name | Type* | Form type |
|---|---|---|
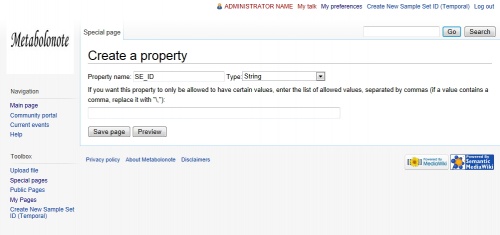
| SE_ID | String | Text Box |
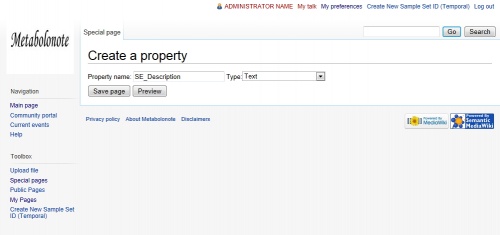
| SE_Description | Text | Text Area |
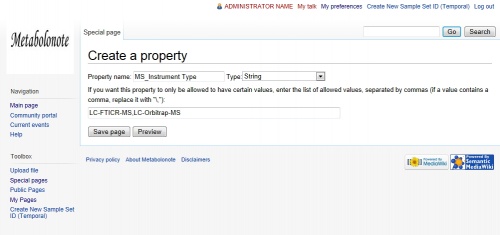
| MS_Instrument Type | String | Pull down |
The following section describes how to create properties of those types contained in the table above.
- Select the "Special Pages" link from the toolbox on the right side of the page.
Select the "Create a property" link.
Create a text box
Enter "Property Name" and "Type" as shown below.
(Example)
Property Name: SE_ID
Type: String
After entering necessary information, click the button.
Create a text area
Enter "Property Name" and "Type" as shown below.
(Example)
Property Name: SE_Description
Type: Text
After entering necessary information, click the button.
Create a pull down menu
Enter "Property Name", "Type", and "Candidate string" as shown below.
(Example)
Property Name: MS_Instrument Type
Type: String
Candidate letters: LC-FTICR-MS,LC-Orbitrap-MS
* The "Candidate string" can be separated with comma as the delimiter.
After entering necessary information, click the button.
Create a template
| Item name | Description |
|---|---|
| Template Name | Title of the template page to be created |
| Field Name | Parameter name described on the form |
| Display Label | Field name displayed when the page is browsed |
| Semantic property | Property name to be used |
| Output Format | Position of the window displayed |
* The items below are kept undefined in the Metabolonote system.
- Category defined by the template
- Aggregation
The following section describes how to create a template based on the table above.
Create a Template
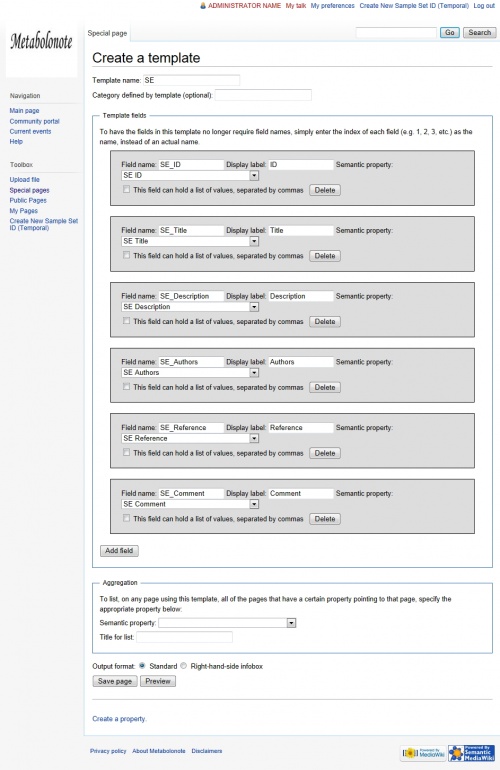
- Select the "Special Pages"link from the toolbox on the right side of the page. Click the "Create a template"link.
Enter each value for the template composition as shown below.
| Template name | Field name | Display label | Semantic property |
|---|---|---|---|
| SE | SE_ID | ID | SE_ID |
| SE_Title | Title | SE_Title | |
| SE_Description | Description | SE_Description | |
| SE_Authors | Authors | SE_Authors | |
| SE_Reference | Reference | SE_Reference | |
| SE_Comment | Comment | SE_Comment |
- The "Output Format" is set to "Standard".
After entering necessary information, click the button.
Creating a form
In the Metabolonote system, the parameters below are used for configuring the form settings.
| Item name | Description |
|---|---|
| Form Name | Title of the form page to be created |
| Add Template | Template that becomes the base of the form created |
| Template Label | Decoration of the edit page with the form used |
| Selection of the parent page | Hierarchical structure of the form For all forms, only one "_TopPage" value can be selected. |
| Label for display | Template name displayed when the page is browsed |
| Label for xml file | Template name indicated when API is output |
| Other parameters | |
| displayItem | Setting items listed in Public Pages and My Pages Only one choice can be selected for all forms |
| relatedPage | Setting item that defines the reference page when page data is browsed |
| xmlField | Data item name indicated when API is used |
The following section describes how to create a form by using the items in the table above.
- Select the link "Special Pages" from the toolbox on the right side of the page.
Select the link "Create a form".
The Metabolonote system uses the following three types of form.
| Form Name | Description | Individual setting item |
|---|---|---|
| SE | Sample set top page of Metabolonote | Setting items listed in Public Pages and My Pages. |
| S | Page under the SE form | |
| M | Page under the S form | Item that refers to the MS form contents |
The following section describes how to make a form based on the table above.
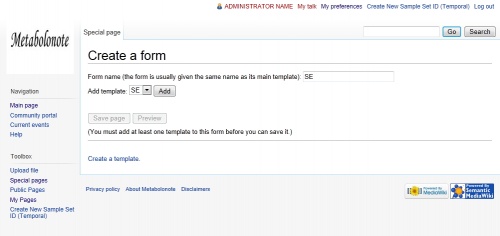
Create an SE Form
As shown in the example below, select the form name and the template used for the form.
(Example)
Form Name: SE
Add Template: SE
After entering the above information, click the button.
Create an SE Form
As shown in the screenshot on the right, set the parameters of the SE form.
* Select the item "displayItem" in the "Field: 'SE_Title'".
After selecting the above item, click the button.
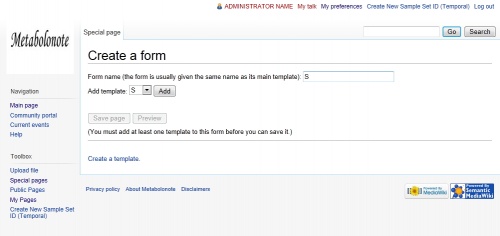
Creating an S form
As shown in the example below, select the form name and the template used for the form.
(Example)
Form Name: S
Add Template: S
After entering the above information, click the button.
Creating an S form
As shown in the screenshot on the right, set the parameters of the S form.
* Select "Selection of the parent page: SE".
After selecting the above item, click the button.
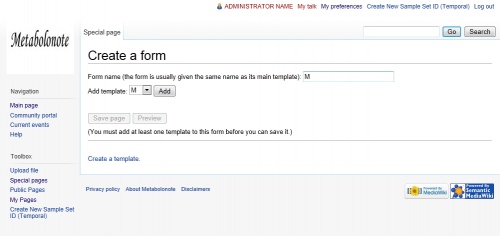
Create an M form
As shown in the example below, select the form name and the template used for the form.
(Example)
Form Name: M
Add Template: M
After entering the above information, click the button.
Create an M form
As shown in the screenshot on the right, set the parameters of the M form.
* Select "Selection of the parent page: S".
Select the item "relatedPage" in "Field: 'M_Method Set ID'".
After selecting the above item, click the button.
Change Public Sample Set ID
Public sample set IDs owned by users are changed.
| Old ID | New ID |
|---|---|
| SE1 | SE100 |
The following section describes how to change the sample set ID based on the table above.
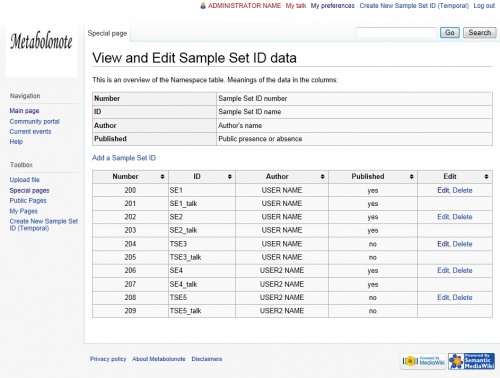
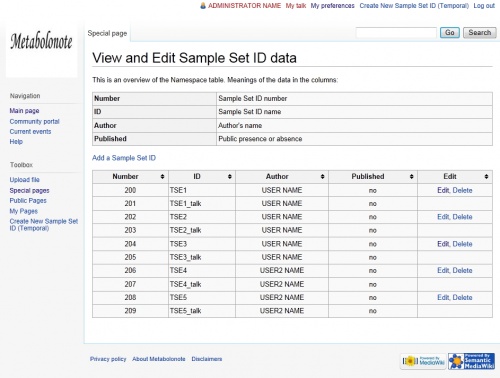
View and Edit Sample Set ID
- Select the "Special Pages" link from the toolbox on the right side of the page.
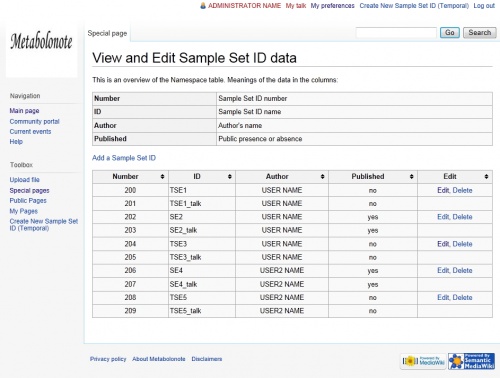
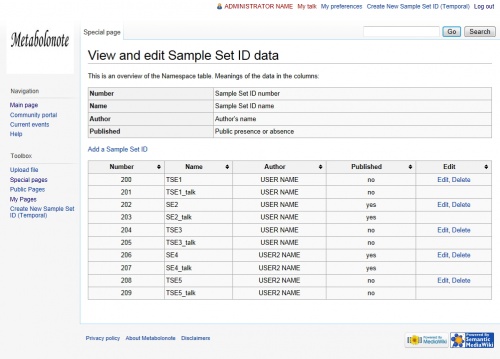
Select the "View and Edit Sample Set ID" link. - Select the "Edit" link in "SE1".
View and Edit Sample Set ID
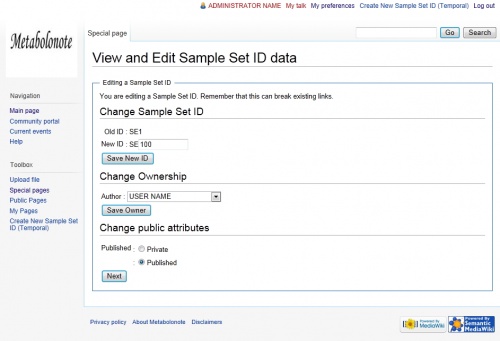
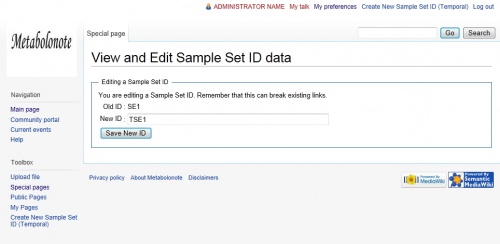
- Enter a number that becomes the new sample set ID to the text box of "Change Name".
* The sample set ID depends on the name of the form created by the administrator. This example describes how to change the sample set ID by using the SE form.
(Example)
New ID:SE100
After entering the value above, click the button.
View and Edit Sample Set ID
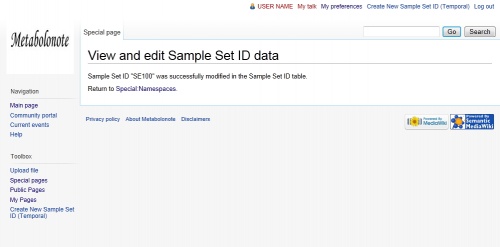
- The sample set ID is changed to the new ID.
Making Sample Set ID Public
The administrator makes sample set IDs created by users public by using the method described here so that all users can view them.
| Before public | After public |
|---|---|
| TSE1 | SE1 |
The following section describes based on the table above.
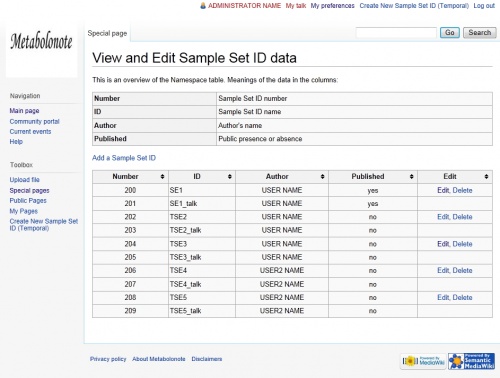
View and Edit Sample Set ID
- • Select the "Special Pages" link from the toolbox on the right side of the page.
Select the "View and Edit Sample Set ID" link. - Select the "Edit" link in "TSE1".
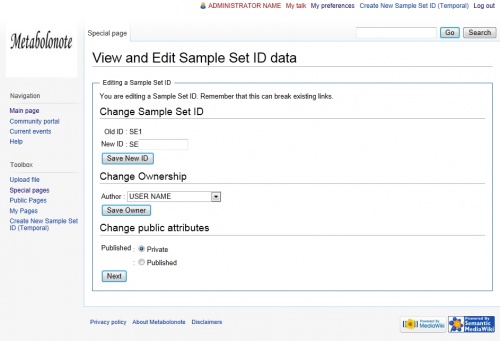
View and Edit Sample Set ID
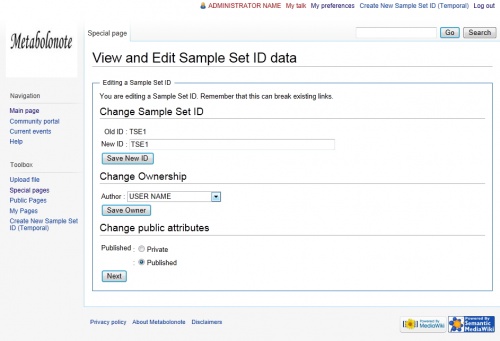
- Check the "Published" radio button.
Click the button.
View and Edit Sample Set ID
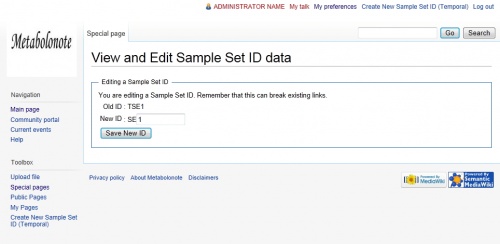
- Enter a number that becomes the new sample set ID after published to the text box.
* The new sample set ID after published depends on the name of the form created by the administrator. This example describes how to make the sample set ID public by using the SE form.
(Example)
New ID:SE1
After entering the value above, click the button.
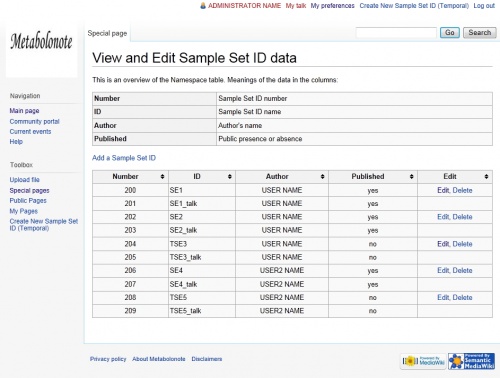
View and Edit Sample Set ID
The sample set ID status is changed as shown below.
(Example)
ID: SE1
Published: Yes
Making Sample Set ID Private
The administrator makes the sample set IDs, published by using the method described here, private so that only ID owners can browse and edit them.
| Before private | After private |
|---|---|
| SE1 | TSE1 |
The following section describes based on the table above.
View and Edit Sample Set ID
- Select the "Special Pages" link from the toolbox on the right side of the page.
Select the "View and Edit Sample Set ID" link. - Select the "Edit" link in "SE1".
View and Edit Sample Set ID
- Check the "Private" radio button.
Click the button.
View and Edit Sample Set ID
- Enter an alphanumeric characters that become the new sample set ID after being made private to the text box.
(Example)
New ID: TSE1
After entering the value above, click the button.
View and Edit Sample Set ID
The sample set ID status is changed as shown below.
(Example)
ID: TSE1
Published: No
Deleting a Page
The administrator can delete pages created by users.
* When deleting pages, export the delete target pages first. How to export data is described here.
- See here for details about how to delete pages.
Deleting Sample Set ID
The administrator can delete sample set IDs created by users.
* When deleting pages, export the delete target pages first. How to export data is described here. Additionally, if there are pages related to the delete target sample set IDs, these related pages cannot be reused after only sample set IDs have been deleted.
| Delete Target |
|---|
| TSE5 |
The following section describes based on the table above.
View and Edit of Sample Set ID
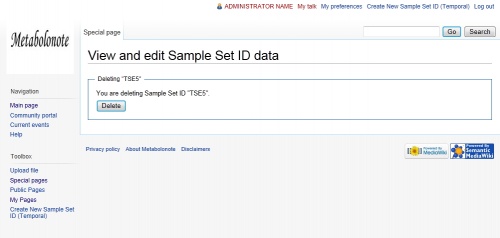
- Select the "Delete" link of the sample set ID to be deleted.
View and Edit Sample Set ID
- Click the button.
