Help:Edit Page Data
![]() English |
English | ![]() 日本語
日本語
Regisitration and Editing of Metadata
After logging in using the user account you created, you can register and edit your own metadata. Only you will be able to view the data you registered and edited. If you wish to publish the metadata you edited, please contact the Metabolonote administrator (See here).
Contents |
Regisitration of Metadata
Introduction
Metabolonote manages metadata based on the hierarchical structure, and assigns each metadata ID in accordance with this hierarchical structure (see here for details). The sample set ID (SE**) that corresponds to the highest layer of the structure is issued and managed by the Metabolonote administrator so that the ID is unique in the entire system. As for metadata on other layers, users can assign their own IDs based on the assignment rule of "ID label + number."
When registering your own metadata, you need to create a tentative sample set ID in order for a new sample set to be created. Based on this tentative ID, you need to create data on lower layers. Concurrently with data release, the tentative ID is replaced with an official sample set ID created by the Metablonote administrator. After data has been released, only the user who created the data will be able to edit the relevant data by using the official sample set ID.
Creating a New Sample Set
The first step to registering metadata is the creation of a new sample set. This section describes the following operation procedures by using TSE1 as an example tentative sample set ID.
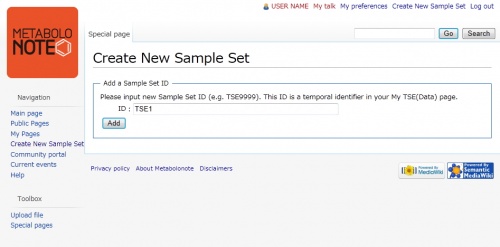
After logging in using the user account you have created, click "Create New Sample Set ID (Temporal)" in the Sidemenu on the left of the page. The page, as shown on the right, is displayed.
* If you have not created your own account, this menu will not be displayed.
Tips
You can also display this page by following the procedures below.
- Select "Create New Sample Set ID (Temporal)" at the top of the page.
- Select the link "Special Pages" from the toolbox on the right side of the page. Click "View and Edit Sample Set ID" in "Other Special Pages" located at the very bottom of the page. Next, click "Add Sample Set ID."
Enter any given sample set ID to the "ID: " field.
TSE1 is entered here, as an example.
Characters available for IDs
Alphanumeric characters can be used for the tentative sample set ID. However, the last character must be a number.
After entering the above information, click the button.
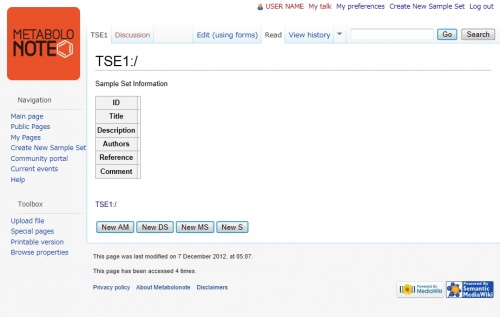
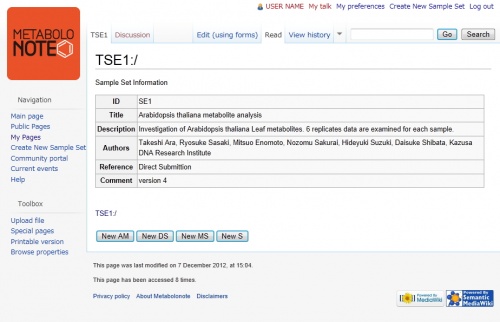
As shown in the figure on the right, the top page of TSE1 is displayed.
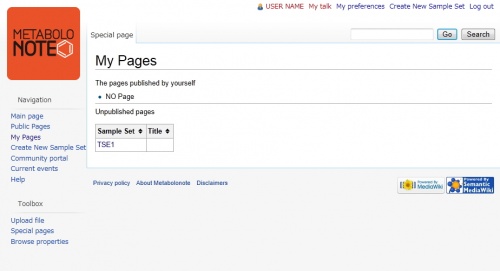
Clicking "My Pages" in the toolbox on the left side of the page displays the sample set as a list, similar to the way in which Public Pages is displayed.
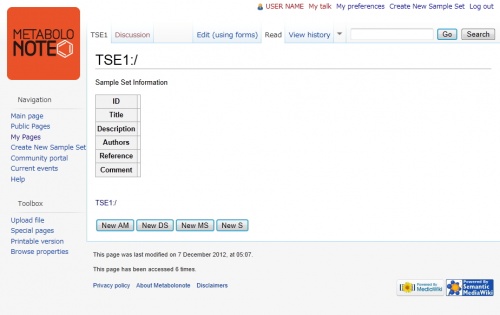
By clicking TSE1 in the "Unpublished pages" list, the top page of TSE1 can be displayed.
See below for details about My Pages.
Editing Metadata
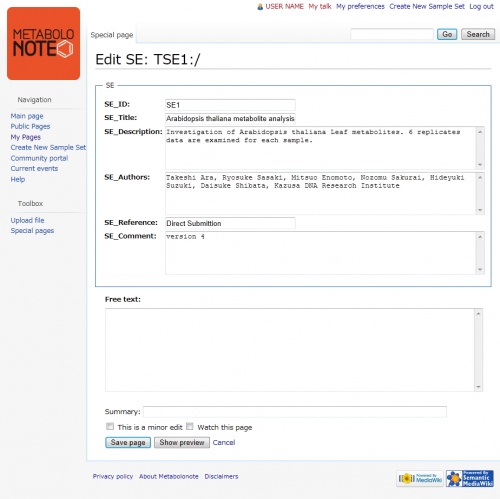
After logging in using the account you created, click "My Pages" in the Side Menu on the left of the page. Next, select the sample set to display the page of metadata that you wish to edit.
When the tab "Edit (by using form)" at the top of the page is clicked, the screen moves to the data edit page with the edit form.
*Only you can edit the data you created.
Edit metadata.
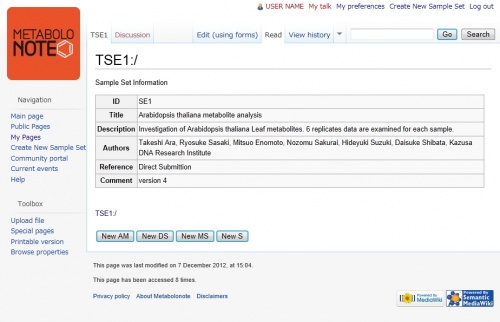
When the button is clicked, what you edited is entered and the registered data is displayed.
*When the button in the data edit page is clicked, a preview of the data entered is displayed. At this point, however, the page content has not yet been saved.
Adding Metadata on Layers Lower than the Sample Set
This section describes how to add samples to a sample set, how to add analysis information to existing samples and how to add new metadata. Here, as an example, new sample information S01 is added to the sample set TSE1.
Select the sample set from "My Pages" in the Side Menu on the left side of the page and jump to the page where you want to create metadata on lower layers.
At the bottom of the page, the ID labels of those layer pages that can be added to TSE1 are displayed. Select and click the button.
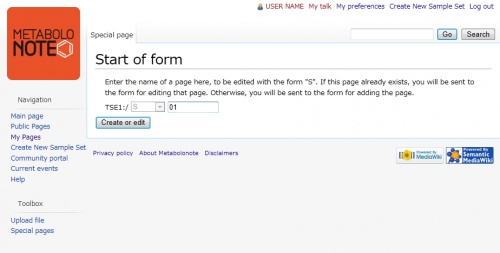
The page "Start of form" is displayed.
The first half of the page name to be created, "TSE1:/S", has been determined, so enter only the number of the sample ID in the textbox.
01 has been entered here as an example.
* See Structure and ID Notation for details about the rules for numbering.
After entering the above information, click the button.
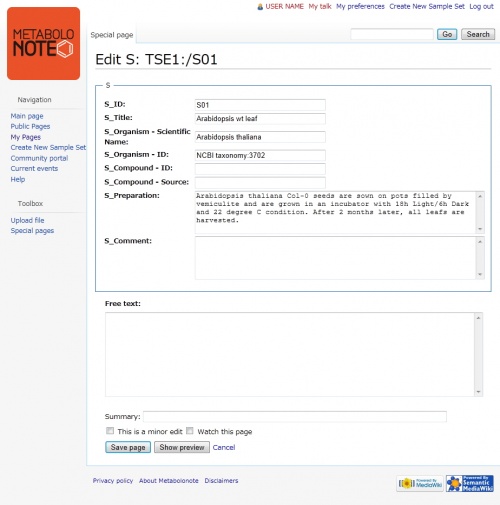
The form edit page "Create S: TSE:/S01" is displayed.
Edit the metadata as necessary.
After entering the necessary information, click the button.
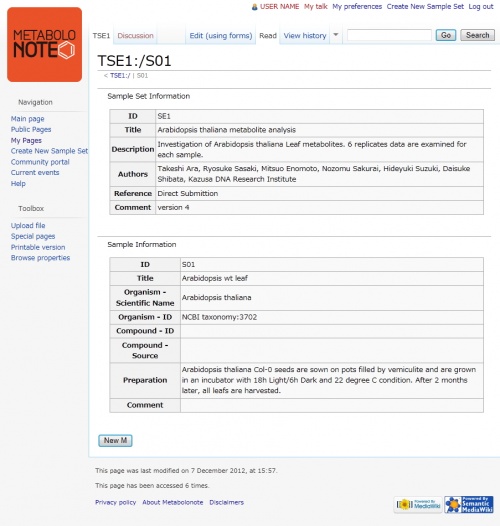
The "TSE1:/S01" page edited is displayed.
Tips
Displayed at the bottom of the page is the button for adding method of instrumental analysis information metadata. Add and edit other pages as necessary using the same procedure as described above.
Use of Templates to create links
It is allowed to the users to attach additional information in the "Free text" area in the metadata editing form. HTML and MediaWiki's markup language is acceptable for the description. Attachments of additional information such as links to other databases storing related data, links to the article of the work, and links to the data comparable with the data, helps readers to understand and utilize thedata.
Several MediaWiki's Templates (listed below) are provided in Metabolonote that facilitate to create links to the other website. Click on the "Usage" link to see the details of use of them.
| Linked to | Link sample created | |
|---|---|---|
| Article website | Usage | |
| Comparable data | The data can be compared with the data SE1_MS1 |
Usage |
| Database (general) | Usage | |
| BioMassBank | Usage | |
| KomicMarket | Usage | |
| KomicMarket2 temporary website |
The peak data files written in TogoMD format are downloadable at the KomicMarket2 temporary web site. |
Usage |
| MassBase |
The raw (binary) and near-raw (text) files of this analysis are available at MassBase. |
Usage |
| MetaboLights | Usage | |
| MetabolomeExpress | Usage | |
| PGDBj | Usage | |
| RIKEN MS2T | Usage | |
| RIKEN DROP Met |
The raw data files are available at DROP Met web site in PRIMe database of RIKEN. |
Usage |
List of Your data(My Pages)
The metadata you created can be viewed as a list. After logging in, select "My Pages" from the Side Menu on the left side of the page.
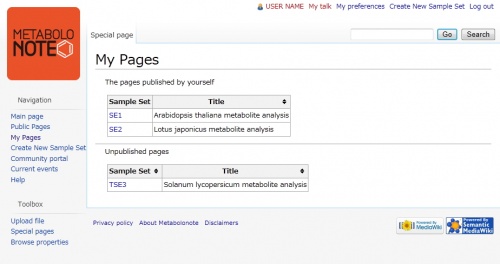
Differing from "Public Pages", "My Pages" is divided into the following two sections: "The pages published by yourself" and "Unpublished pages."
The top section contains metadata already assigned an official SE number and published by the system administrator.
The bottom section contains metadata not yet published.
Both sections contain metadata created by the user logged into the system.
In the screenshot on the right, SE1 and SE2 show published data, and TSE3 shows unpublished data.
Regardless of whether data is public or closed, you can edit your metadata by clicking the corresponding sample set ID.
Tips
You can also browse My Pages by following the procedures below.
- Select the link to "Special Pages" from the toolbox on the left side of the page, then select "Personal Pages" from "Other Special Pages" at the very bottom of the page.
Deleting Metadata
In Metabolonote, users cannot delete the sample sets they created. Only the system administrator has the authority to delete data. Contact the Metabolonote administrator at the e-mail address below to request deletion of any pages you no longer need.
E-mail:
metabolonote ![]() kazusa.or.jp
kazusa.or.jp
(Please change the "@" to one-byte character size)
Advanced Functions
Export/Import of Data
User's data can be exported in the unit of a sample set and saved as a file (published data can also be exported). Data can also be imported to Metablonote using exported data files.
You can utilize these export and import functions in the situations described below.
Backup of edited metadata
We take the utmost care in protecting Metabolonote data. However, should an emergency occur, such as the server crashing, you can restore your data with backup data. Therefore, we recommend backing up your data periodically by exporting data.
Transfer data to another Metabolonote system
The core programs of Metabolonote are available for use free of charge. You can use these programs to build your own Metabolonote system on your server. When transferring data to "another" Metabolonote system, you can utilize these export and import functions.
- As for the core programs of Metabolonote, you can set any given data layers, input forms and ID labels in addition to the formats of SE, S, M, and D. By doing so, you can manage completely different metadata. In order for exported data to be imported properly, both the system where data is exported and the system where data is imported should be configured based on the same format.
Batch registration of a vast amount of data
The exported file will be in a XML-format text file. Users can directly create and edit the XML file while keeping in mind the XML structure and page IDs. This makes it possible to register a vast amount of metadata in batches.
Export (backup)
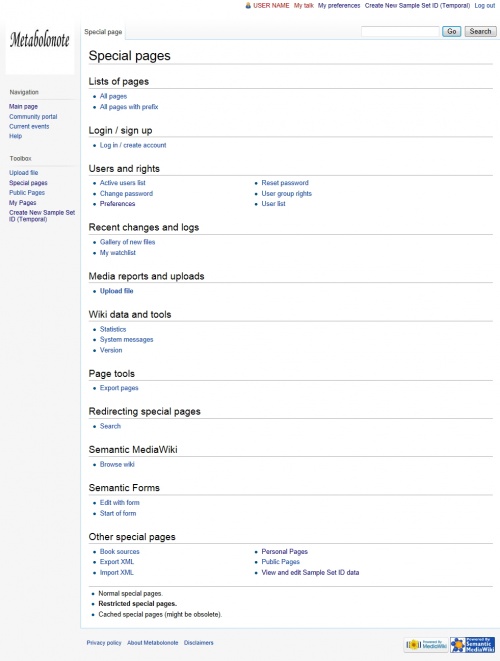
Click "Special Pages" in the toolbox on the left side of the page. Next, select "Export XML" from "Other Special Pages" at the very bottom of Special Pages.
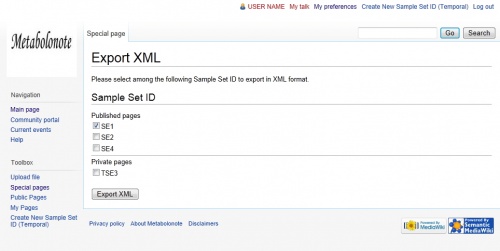
The page appears as the screenshot on the right.
Check the sample set(s) you wish to export (you can select multiple sample sets). In this example, SE1 of Public Pages is selected.
Finally, click the button.
The selected data will be exported with the file name shown below.
Metabolonote-xxxxxxxxxxxxxx.xml
* "x" indicates the time stamp of when the data was exported.
Even though multiple sample sets are selected, only one file is produced as an export file.
Import (recovery/transfer)
By using the exported XML file, you can import metadata into Metabolonote for the sample set ID you created.
Preparation
You must create an Sample Set ID in the Metablonte system prior to importing data. Where data is transferred among multiple Metabolonote systems, if a sample set ID does not already exist in the target systems, create a sample set ID by referring to Creating a New Sample Set.
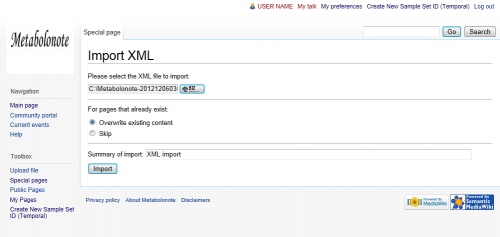
Click the "Special Page" link in the toolbox on the left side of the page, then select "Import XML" from the field "Other Special Pages" at the very bottom of Special Page.
Configure the following settings described below on the "Import XML" page that is displayed.
Select the XML file to be imported
Click the button in the field of "Please select the XML file to import:" to select the XML file to be imported.
Select actions for the existing pages
In the field of "For pages that already exist:", if "Overwrite existing content" is selected, the existing data will be overwritten. If "Skip" is selected, the existing data is saved without being overwritten.
Comments of import (not essential)
You can write comments in the field "Summary of import:".
After finishing the procedures above, click the button.
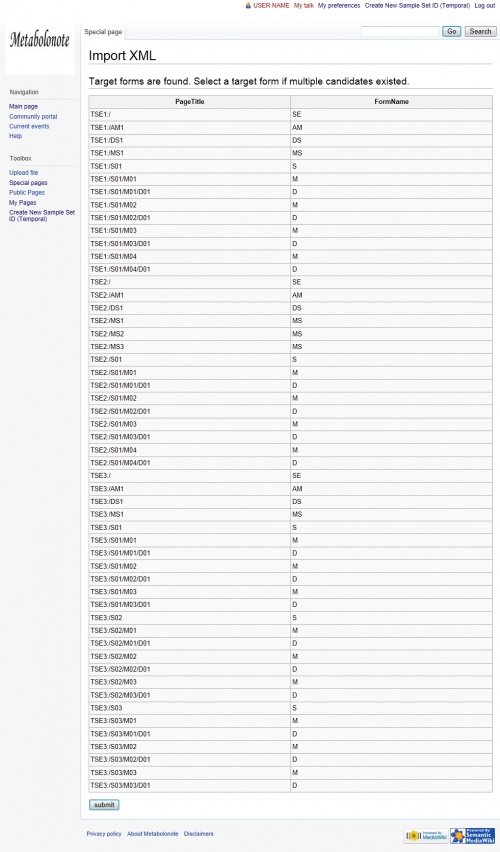
The confirmation page for metadata formats applied to each page (classifications of S, M, and D) is displayed.
* Notice that if "Overwrite existing content" has been selected in the previous procedure, the existing page will be overwritten.
After confirming the above information, click the button.
If metadata formats different from Metabolonote are defined, the system may not be able to determine which format to be used. In such a case, radio buttons to select the format to be used are displayed. After selecting the appropriate format, click the button.
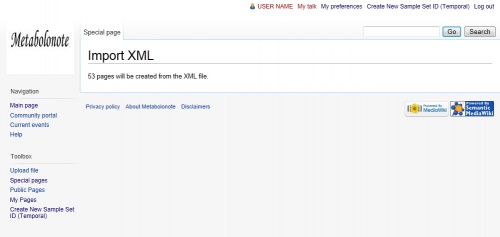
When the message "** pages will be created from the XML file." is displayed as shown on the right, the import process has been completed.
* "**" indicates the number of pages that have been imported.
(Supplementary) Import with a Different Sample Set ID
Users may not be able to create the sample set ID which they used when the data was exported because the sample set ID has already been create by another user in the Metablonote system to which data was imported. Should this happen, you can create a different sample set ID by editing the XML file that was exported. Using this newly created sample set ID, you can import data.
This section describes the example case where the data exported as TSE1 is imported again as TSE001.
Open the XML file exported by text editor. Check the line containing the portion described below.
<Namespace Name="TSE1">
* TSE1 is a Sample Set ID when the data is exported.
This description could exist in multiple lines within the file where multiple sample set IDs were exported.
Replace TSE1 with the new sample set ID.
(Example)
<Namespace Name="TSE001">
*You need to create the sample set ID to be set, TSE001 in this case, in the Metabolonote system prior to importing the data.
Save and close the XML file.
Use this file to import data.
(Supplementary) Check if Import has been Completed
Usually, the import process is finished in 30 seconds and the message of import completion is displayed. However, when a vast amount of data with thousands of orders is imported, it could take time before the message page is displayed and the import process may have failed even though the page has been displayed. You can use the following procedures to confirm that your data has completely been imported. Confirm as necessary.
Open the XML file to be imported by text editor. Check the line containing the portion described below. This description could exist in multiple lines within the file where multiple sample set IDs exist.
<Namespace Name="TSE1">
* TSE1 indicates an example of the sample set ID.
Check the sample set ID that appears at the very end of the XML file.
Confirm that the data with this sample set ID has successfully been imported on the Metabolonote system.
The import process proceeds from the top line of the XML file. If the last data has been imported, the whole process of import has been successfully completed. If not, separate the XML file into several sample sets and import each of them separately. Make a copy of the original XML file and delete the whole portion between the tags <Namespace> and </Namespace>. By doing so, you can also delete the corresponding sample set data from the file copied. Use such files to import data.
Changing the Sample Set ID
Users can change the tentative sample set ID assigned to their unpublished metadata. * Users cannot change the ID of published sample sets already assigned an official SE ID.
Click "Special Pages" in the toolbox on the left side of the page, and then select "View and Edit Sample Set ID" from the field of "Other Special Pages" at the very bottom of the page.
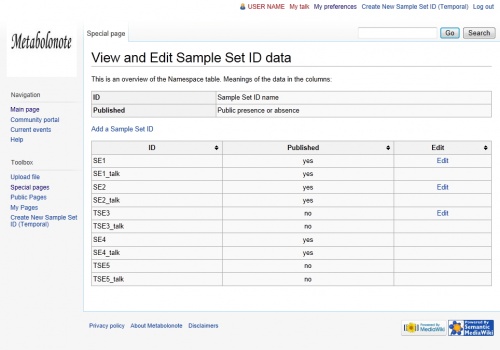
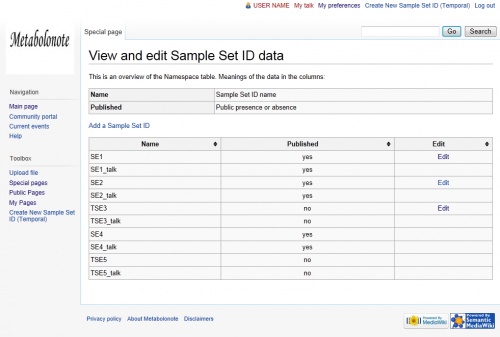
The page "View and Edit Sample Set ID" is displayed.
This section describes the example case where the existing TSE3 is changed to the new ID, SAMPLESET300.
Click the link to "Edit" for the sample set ID you wish to be change, (TSE3 in this case).
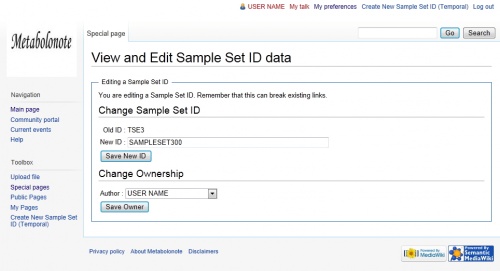
The edit page is displayed, as shown on the right.
Enter the alphanumeric characters to be used for the new sample set ID (SAMPLESET300 in this case) in the text box located in the "New ID:" field.
Characters available for IDs
Alphabetical characters and numbers can be used for the tentative sample set ID. However, the last character must be a number.
After entering the new ID, click the button.
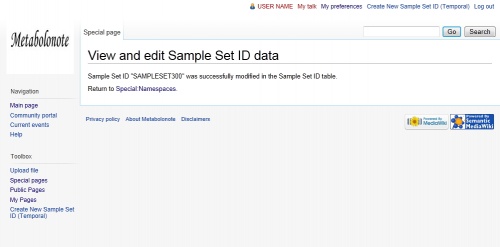
The new sample set ID has been applied.
Changing the Owner of the Sample Set
Users can transfer the ownership of sample sets they own other users.
* When the ownership is changed using this function, the prior user can no longer edit the data of the sample sets. Only the user to whom the ownership was transferred can edit the data. Please exercise caution at this point.
If the ownership has been changed by mistake, contact the Metabolonote administrator via e-mail at the e-mail address below.
E-mail:
metabolonote ![]() kazusa.or.jp
kazusa.or.jp
(Please change the "@" to one-byte character size)
Possible Usages
These functions are rarely used. However, these functions may be required in such cases where, for example, a researcher who was the prime user of data management on Metablonote in one laboratory moves to another research institution, and data entry work is transferred to another manager.
This section describes the example case where the user named USER_NAME transfers his ownership of sample set SE1 to a new user USER2_NAME.
Log in the system (In this case, the account is USER_NAME).
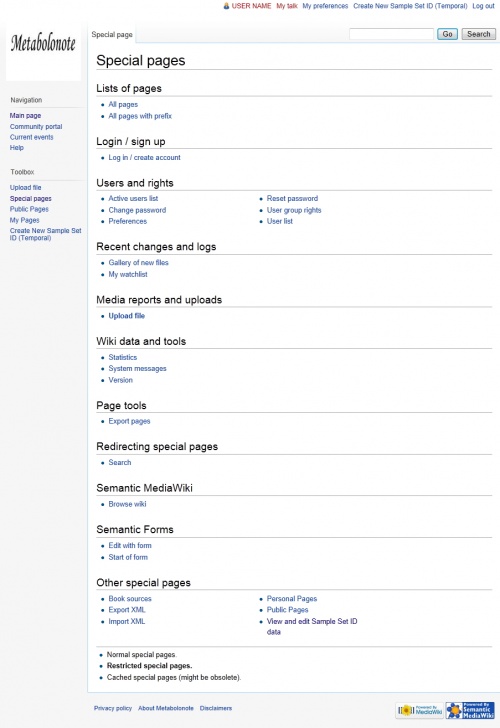
Click "Special Pages" in the toolbox on the left side of the page, then click "View and Edit Sample Set ID" in the "Other Special Pages" field at the very bottom of the page.
Afterward, the page "View and Edit Sample Set ID" is displayed.
Select the "Edit" link in the field of the sample set ID (SE1) to be changed.
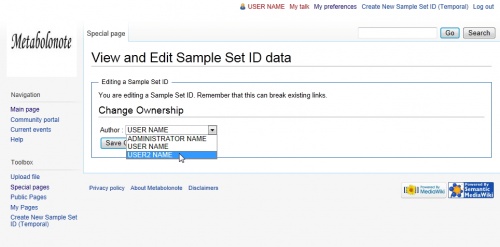
The edit page is displayed, as shown on the right.
Select the user name to whom the ownership is to be transferred (USER2_NAME) from the pull-down menu in the "Change Owner" field.
After selecting the user name, click the button.
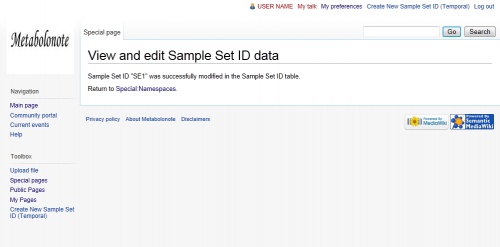
The page shown on the right is displayed, indicating that the ownership has been transferred.
Other General Settings
Changing the Language
You can change the language setting for the menu, etc. to the language of your choice. This setting will not affect other users' language settings.
This section describes the example case where the language setting is changed from English to Japanese.
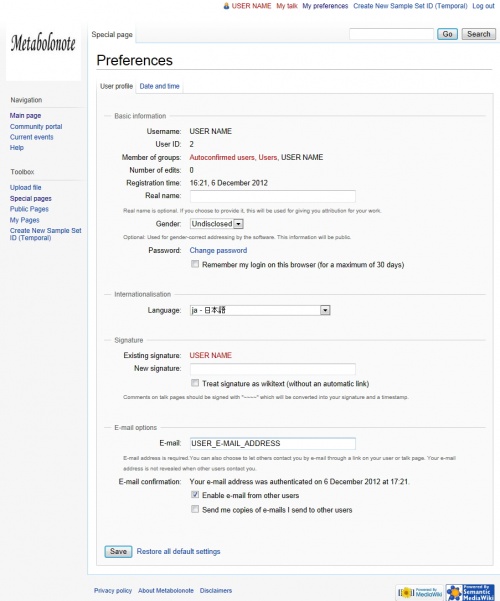
Select the link to "My preference" from the very top of the page.
Tips
You can also change the language setting by following the steps below.
- Click "Special Pages" in the toolbox on the left side of the page, then select "Preferences" in the "Users and rights" field.
In the "Language:" field of "Internationalization" on the "User profile" tab, select the language ("ja - Japanese" in this case).
Click the button to save the language setting.
Changing Password
Users logged into the system can change their passwords. As a security measure, it is recommended you change your password periodically.
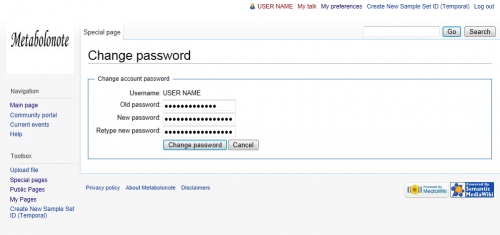
Select "My preferences" at the very top of the page, then click the link "Password: Change password" in the "Basic information" field on the "User profile" tab.
The password change page is displayed, as shown on the right.
Tips
You can also display the password change page by following the procedures below.
- Click "Special Pages" in the toolbox on the left side of the page. Select the link to "Change password" in the "User and rights"field.
Enter the old password and the new password (two input boxes), then click the button.
Resetting the Password
If you forget your login password, you can reset your password.
This section describes how to reset your password by using the settings below.
| User name(Login Account) | USER_NAME |
|---|---|
| Tentative password | TEMPORARY_PASSWORD |
| New password | USER_PASSWORD |
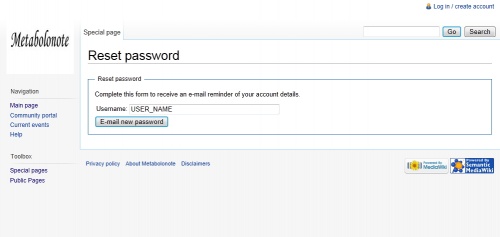
Click the link to "Special Pages" in the toolbox on the left side of the page. Select "Reset Password" in the "Users and rights" field in Special pages.
The page is displayed, as shown on the right.
Enter your own user name in the "User name:" field.
(Example)
Username: USER_NAME
Click the button.
Confirmation of E-mail Message
The e-mail containing the message below is sent to your e-mail address.
Someone (probably you, from IP address xxx.xxx.xx.xxx) requested a reminder of your
account details for Metabolonote (http://webs2.kazusa.or.jp/metabolonote/index.php/Main_Page).
The following user account is associated with this e-mail address:

Username:USER NAME
Temporary password:TEMPORARY_PASSWORD

This temporary password will expire in 7 days.
You should log in and choose a new password now. If someone else made this
request, or if you have remembered your original password, and you no longer
wish to change it, you may ignore this message and continue using your old
password.
Log in to the system using the tentative password sent via e-mail, TEMPORARY_PASSWORD, in order to verify your e-mail address.
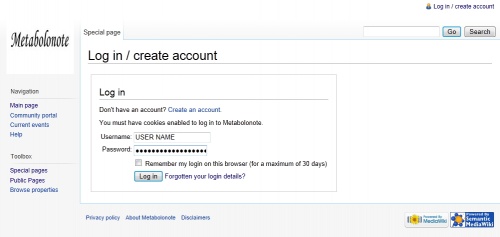
Select the link to "Log in / create account" on the upper right side of the page.
On the page that is displayed, enter the information contained in the message you received, as shown below.
(Example)
Username: USER_NAME
Password: TEMPORARY_PASSWORD
After entering the information above, click the button.
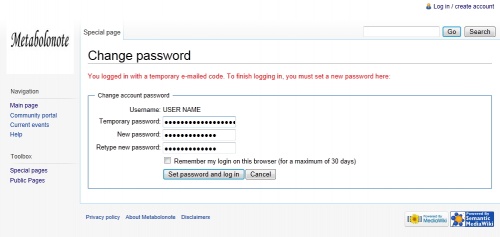
Next, change the tentative password to a password only you know. Enter the information, as shown below.
(Example)
Temporary password: TEMPORARY_PASSWORD
New password: USER_PASSWORD
Retype new password: USER_PASSWORD
After entering the information above, click the button.
This process is completed if you are logged in and USER_NAME is displayed at the very top of the page.
